
What You’ll Learn
- Installing the Jetpack Protect Integration and plugin
- Viewing and fixing vulnerabilities on child sites
- Connecting child sites to Jetpack
- Using bulk actions to manage multiple sites
Integration Add-on - This add-on extends MainWP to work with Jetpack Protect. Requires Jetpack Protect to be installed and active on your child sites.
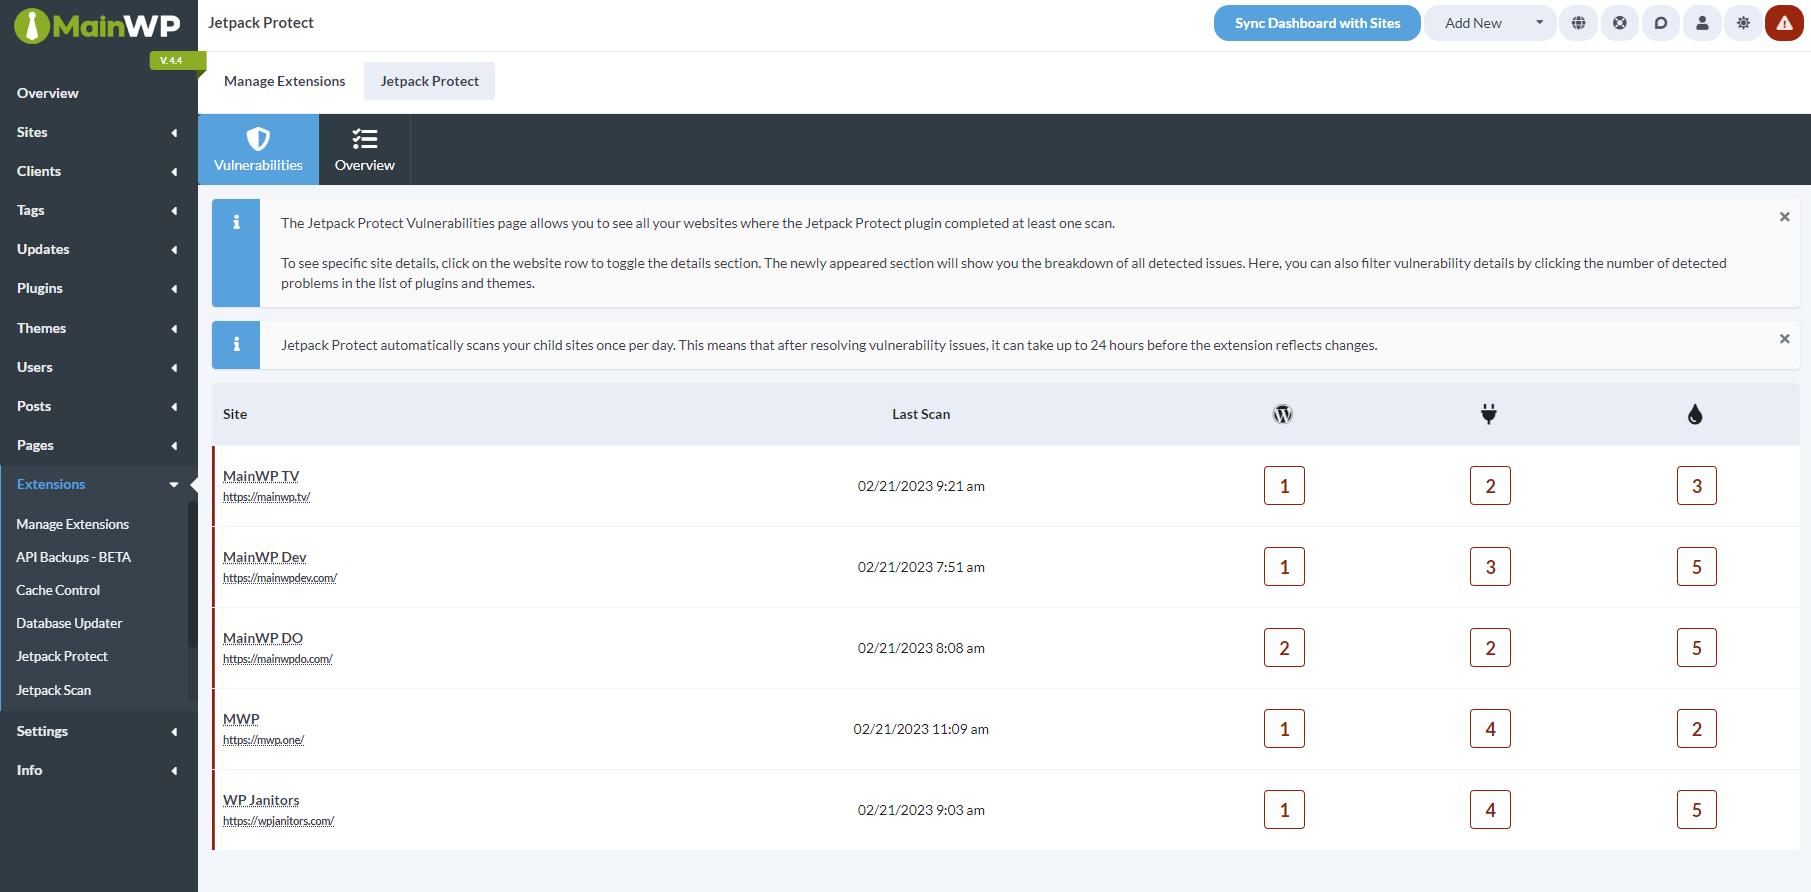
The Jetpack Protect Integration allows you to see any vulnerabilities on your child sites directly in your MainWP Dashboard. The integration works in tandem with the Jetpack Protect plugin on your child sites. Both the integration and the plugin are free to download and use.
Jetpack Protect automatically scans your child sites once per day. This means that after resolving vulnerability issues, it can take up to 24 hours before the integration reflects changes.
Install the Integration
First step is to install the Jetpack Protect plugin on the desired child sites and activate it. After that, follow these steps to install the Jetpack Protect Integration.1
Go to your MainWP Dashboard
2
Go to MainWP Dashboard > Add-ons > Manage Add-ons
3
Click the Install Add-ons button
Click the Install Add-ons button 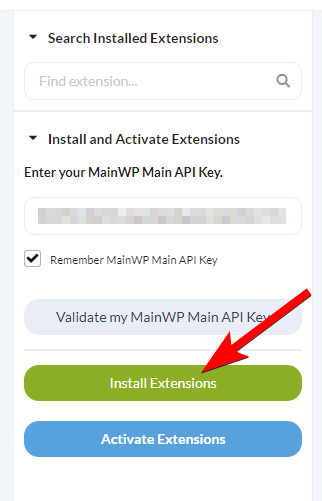
4
Locate the Jetpack Protect Integration and select it
5
Click the Install button
6
Once the installation process is complete, click the Activate Add-ons button.
Once the installation process is complete, click the Activate Add-ons button. 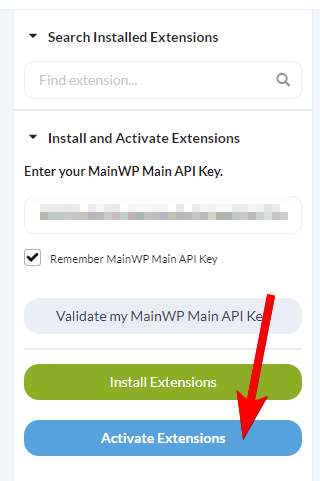
Vulnerabilities tab
Fix a vulnerability
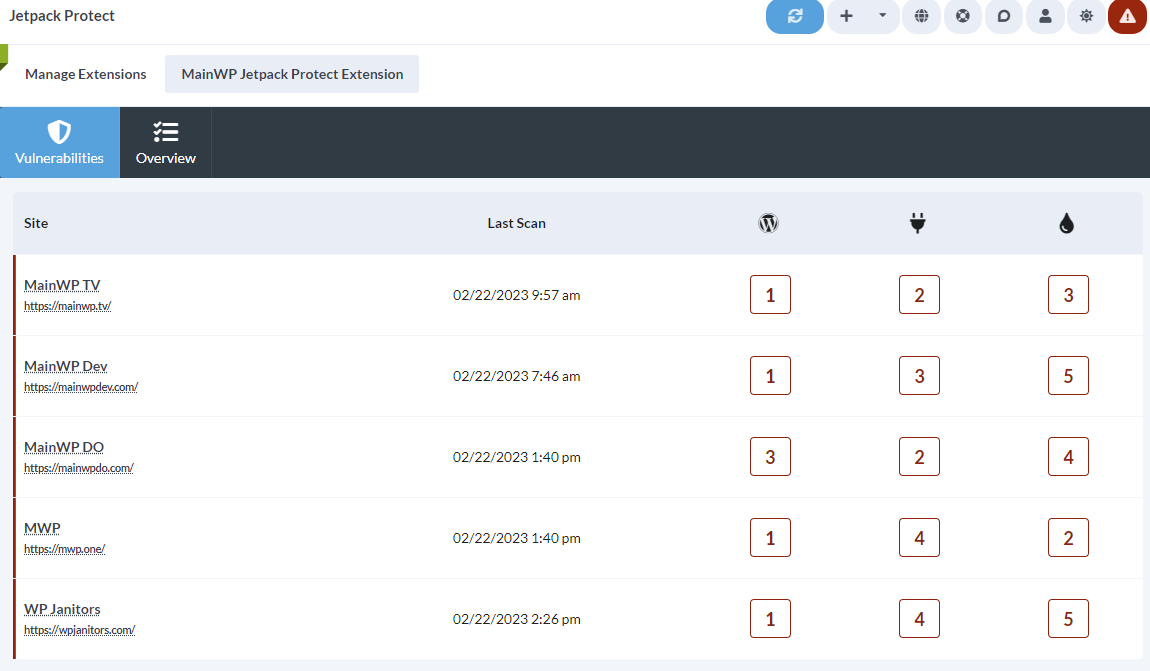
Then you can click a vulnerability to reveal more information about it. For supported WordPress core, plugin, and theme vulnerabilities, you can update to the fixed version when one is available. For plugin and theme vulnerabilities, you can also delete the affected item. Deleting requires the Delete Plugins or Delete Themes Dashboard permission, and the item must be flagged in the site’s latest scan.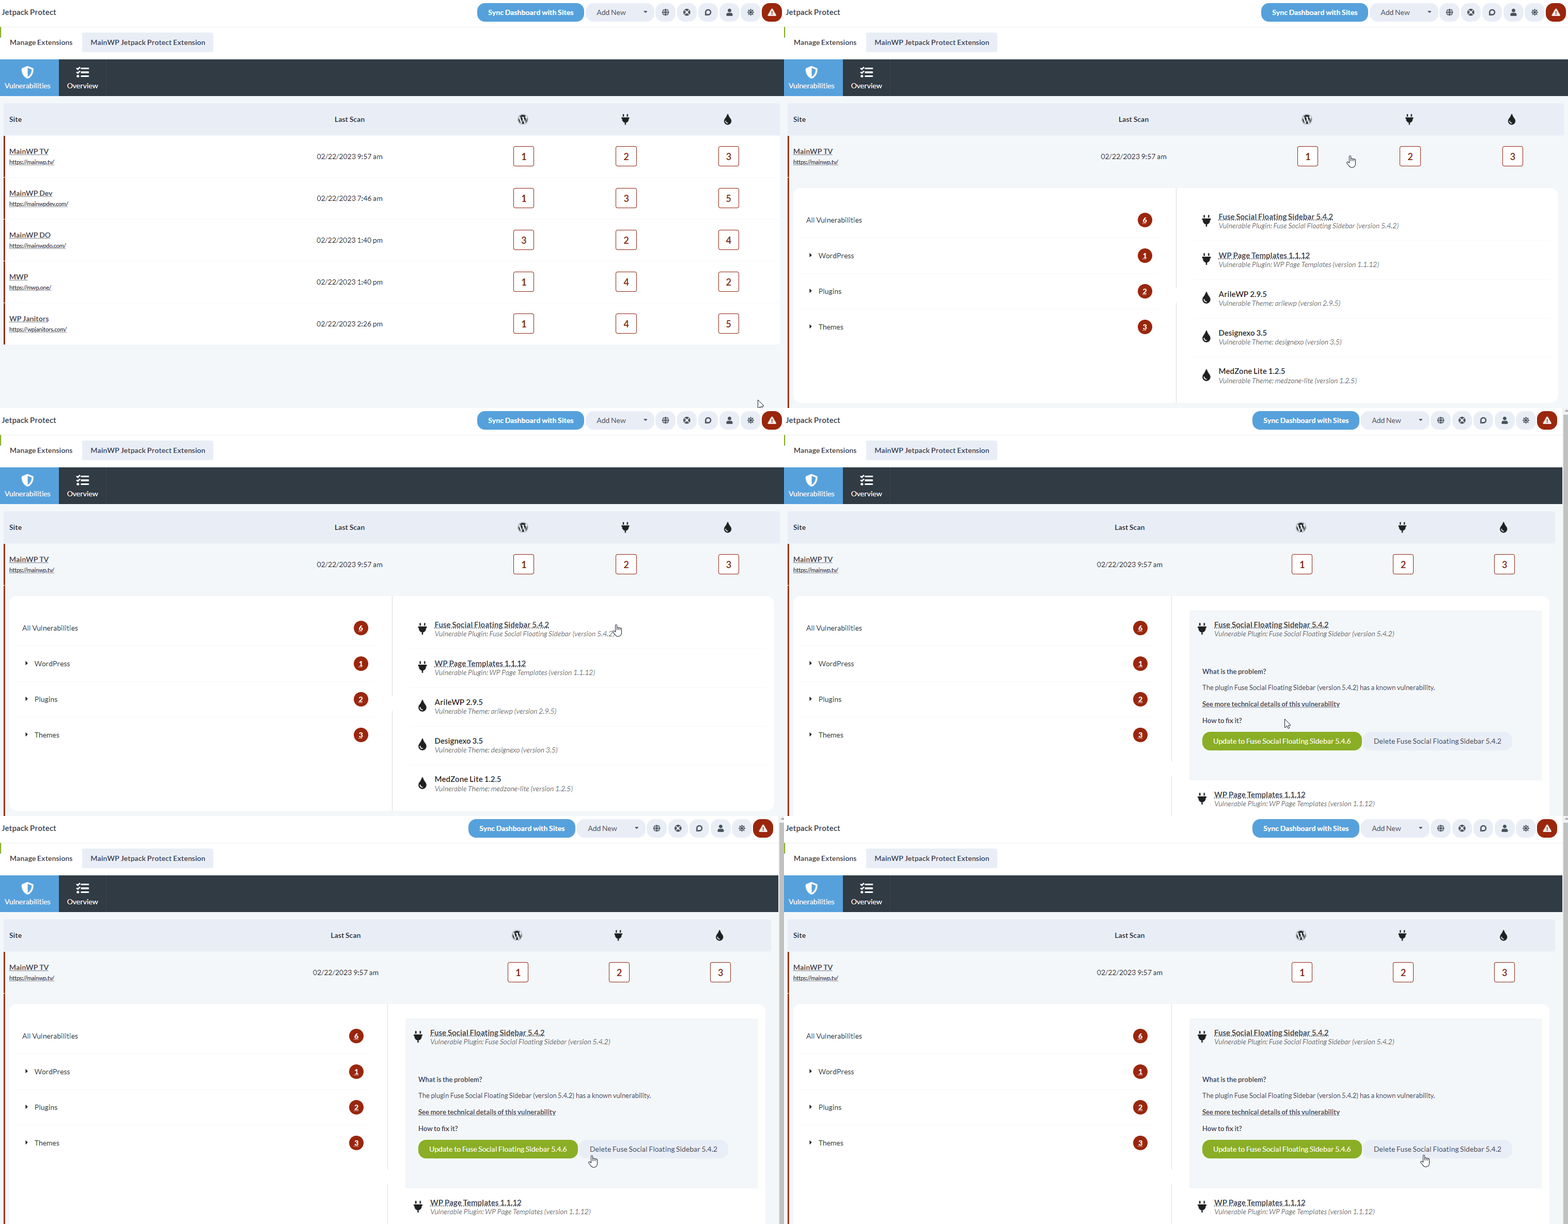
Overview tab
This page provides you with additional actions related to the Jetpack Protect plugin. The ellipsis menu includes actions such as Overview, Edit, Go to Jetpack Protect, Hide Jetpack Protect or Unhide Jetpack Protect, and Connect Jetpack Protect or Disconnect Jetpack Protect.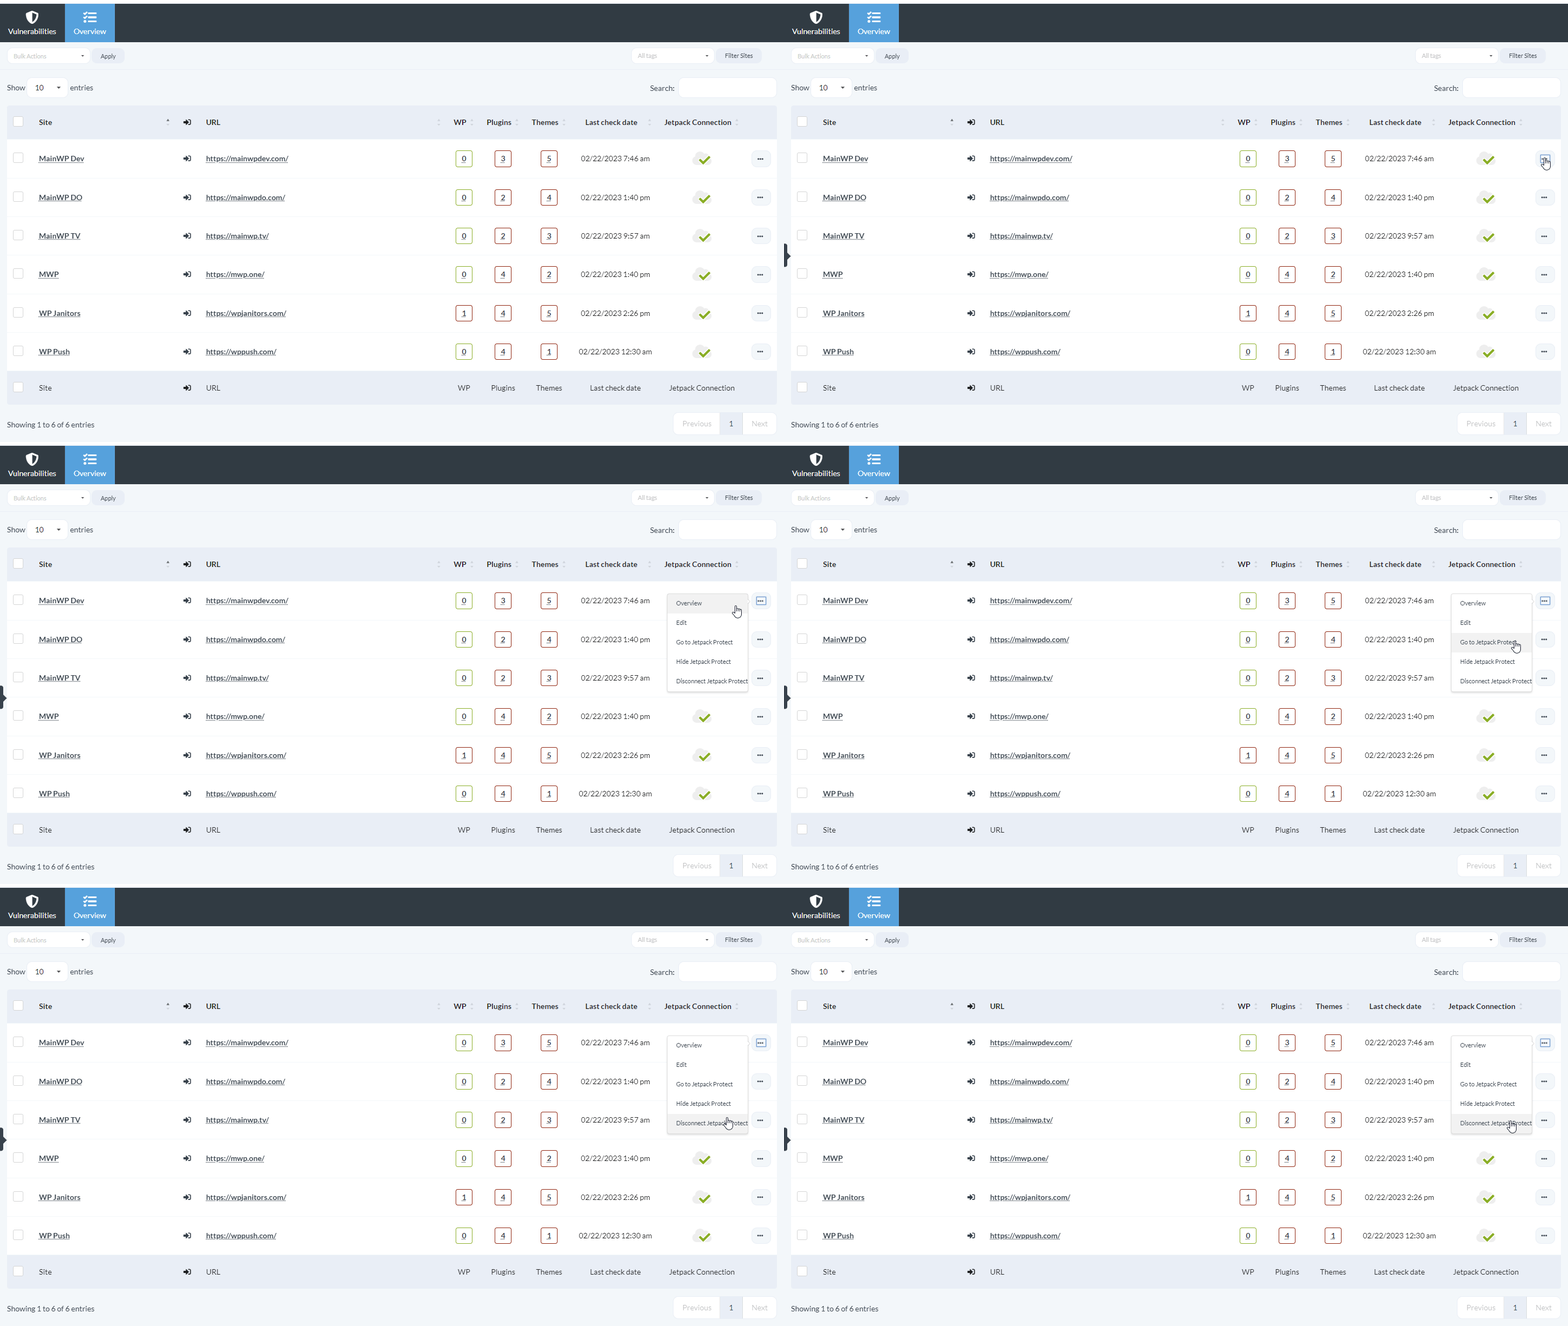
Team Control compatibility
The Jetpack Protect Integration respects access restrictions configured by the Team Control Add-on. Team members see the Jetpack Protect site page and the Jetpack Protect Dashboard widget only when their role includes Jetpack Protect in its Allowed Add-ons list. Users whose role does not include it do not see either one. To grant access, edit the role in MainWP > Add-ons > Agency > Team Control and select Jetpack Protect under Allowed Add-ons.Jetpack Protect REST API
The integration registers a v1 REST API endpoint atwp-json/mainwp/v1/jetpack-protect/result. All MainWP REST API calls, including full documentation and examples, are publicly available on Postman. Please refer to our REST API documentation for more details on enabling REST API and managing API keys.
Database Health Check
The Jetpack Protect Integration supplies its site status and scan results tables and expected column definitions to MainWP Dashboard’s database schema checks. With MainWP Dashboard 6.2 or later and the Add-on active, open MainWP > Info > Server and review the Database section for missing tables, missing columns, or incorrect column definitions. See Database Health Check for interpreting the results and preparing a support report. These checks report the Dashboard database structure; they do not repair tables or scan your Child Sites for vulnerabilities.MainWP Abilities
The Jetpack Protect Integration provides ten abilities: two stored summary reads, plus site-level stored observations, findings, history, live control state, operation status, refresh requests, and previewed connection or visibility changes. Live control reads, connection and visibility changes, and refresh execution require MainWP Child 6.4 or later. Stored-data reads do not contact the Child. Queued work needs working scheduled tasks on MainWP Dashboard. See Jetpack Protect Abilities for inputs, permissions, examples, and operation results.Quick Start with Jetpack Protect
The integration works in tandem with the Jetpack Protect plugin on your Child Sites. Both the integration and the plugin are free to download and use.1
Install the Jetpack Protect Integration
2
Install the Jetpack Protect plugin on all desired child sites
3
Navigate to MainWP Dashboard > Add-ons > Security > Jetpack Protect
Navigate to MainWP Dashboard > Add-ons > Security > Jetpack Protect.NOTE: If you don’t immediately see all Child Sites on which you’ve installed Jetpack Protect plugin, please Synchronize all sites.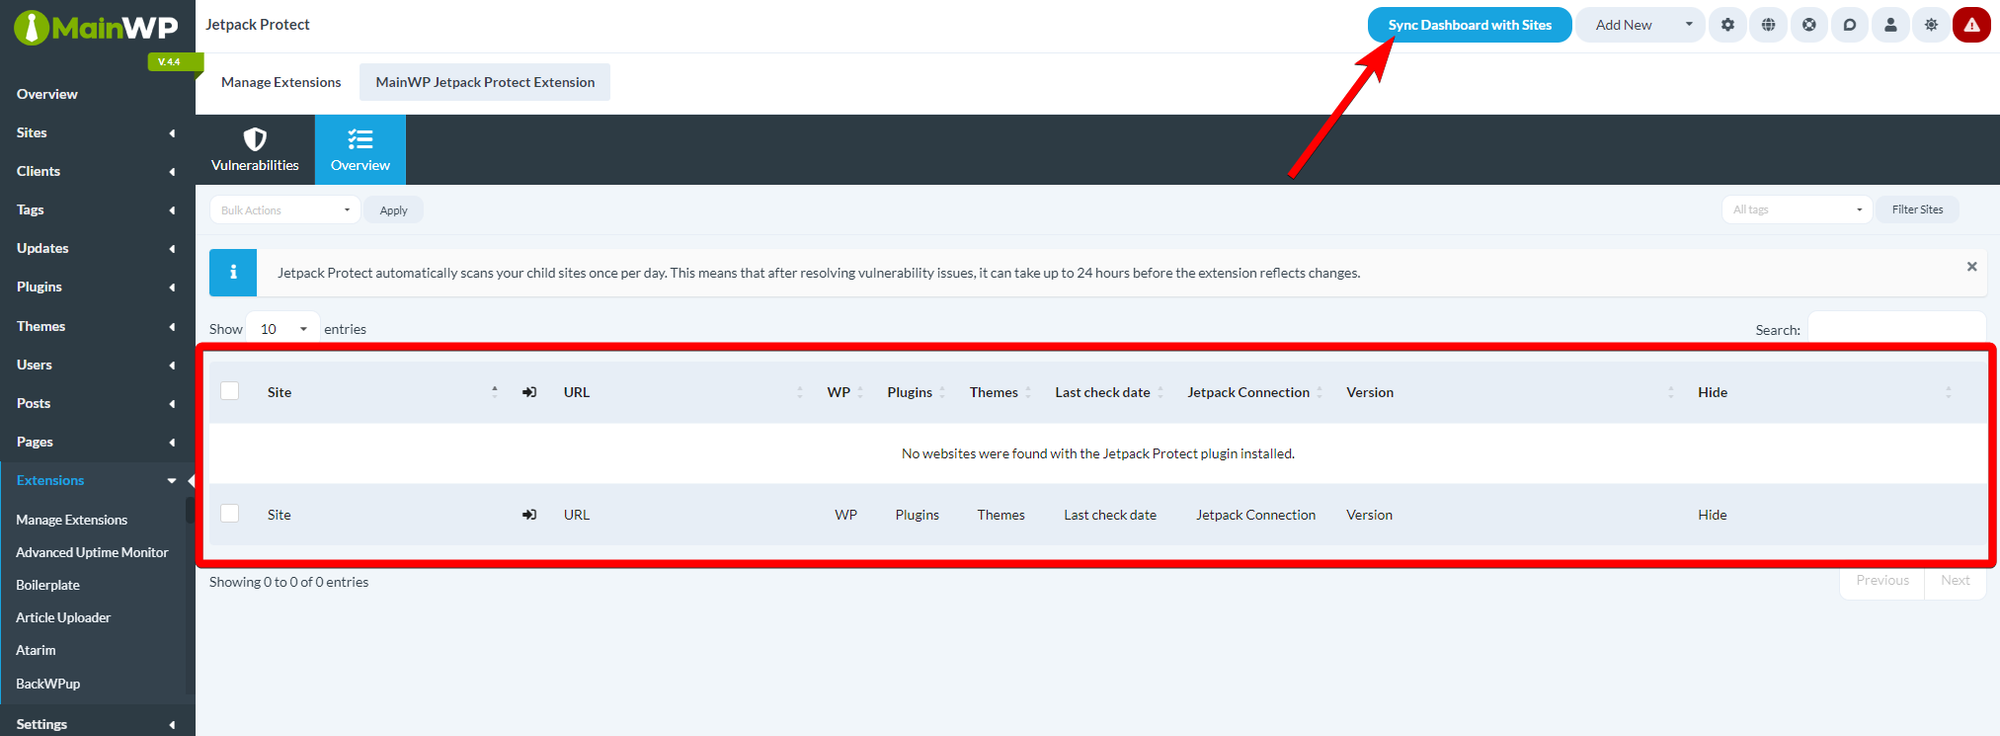
4
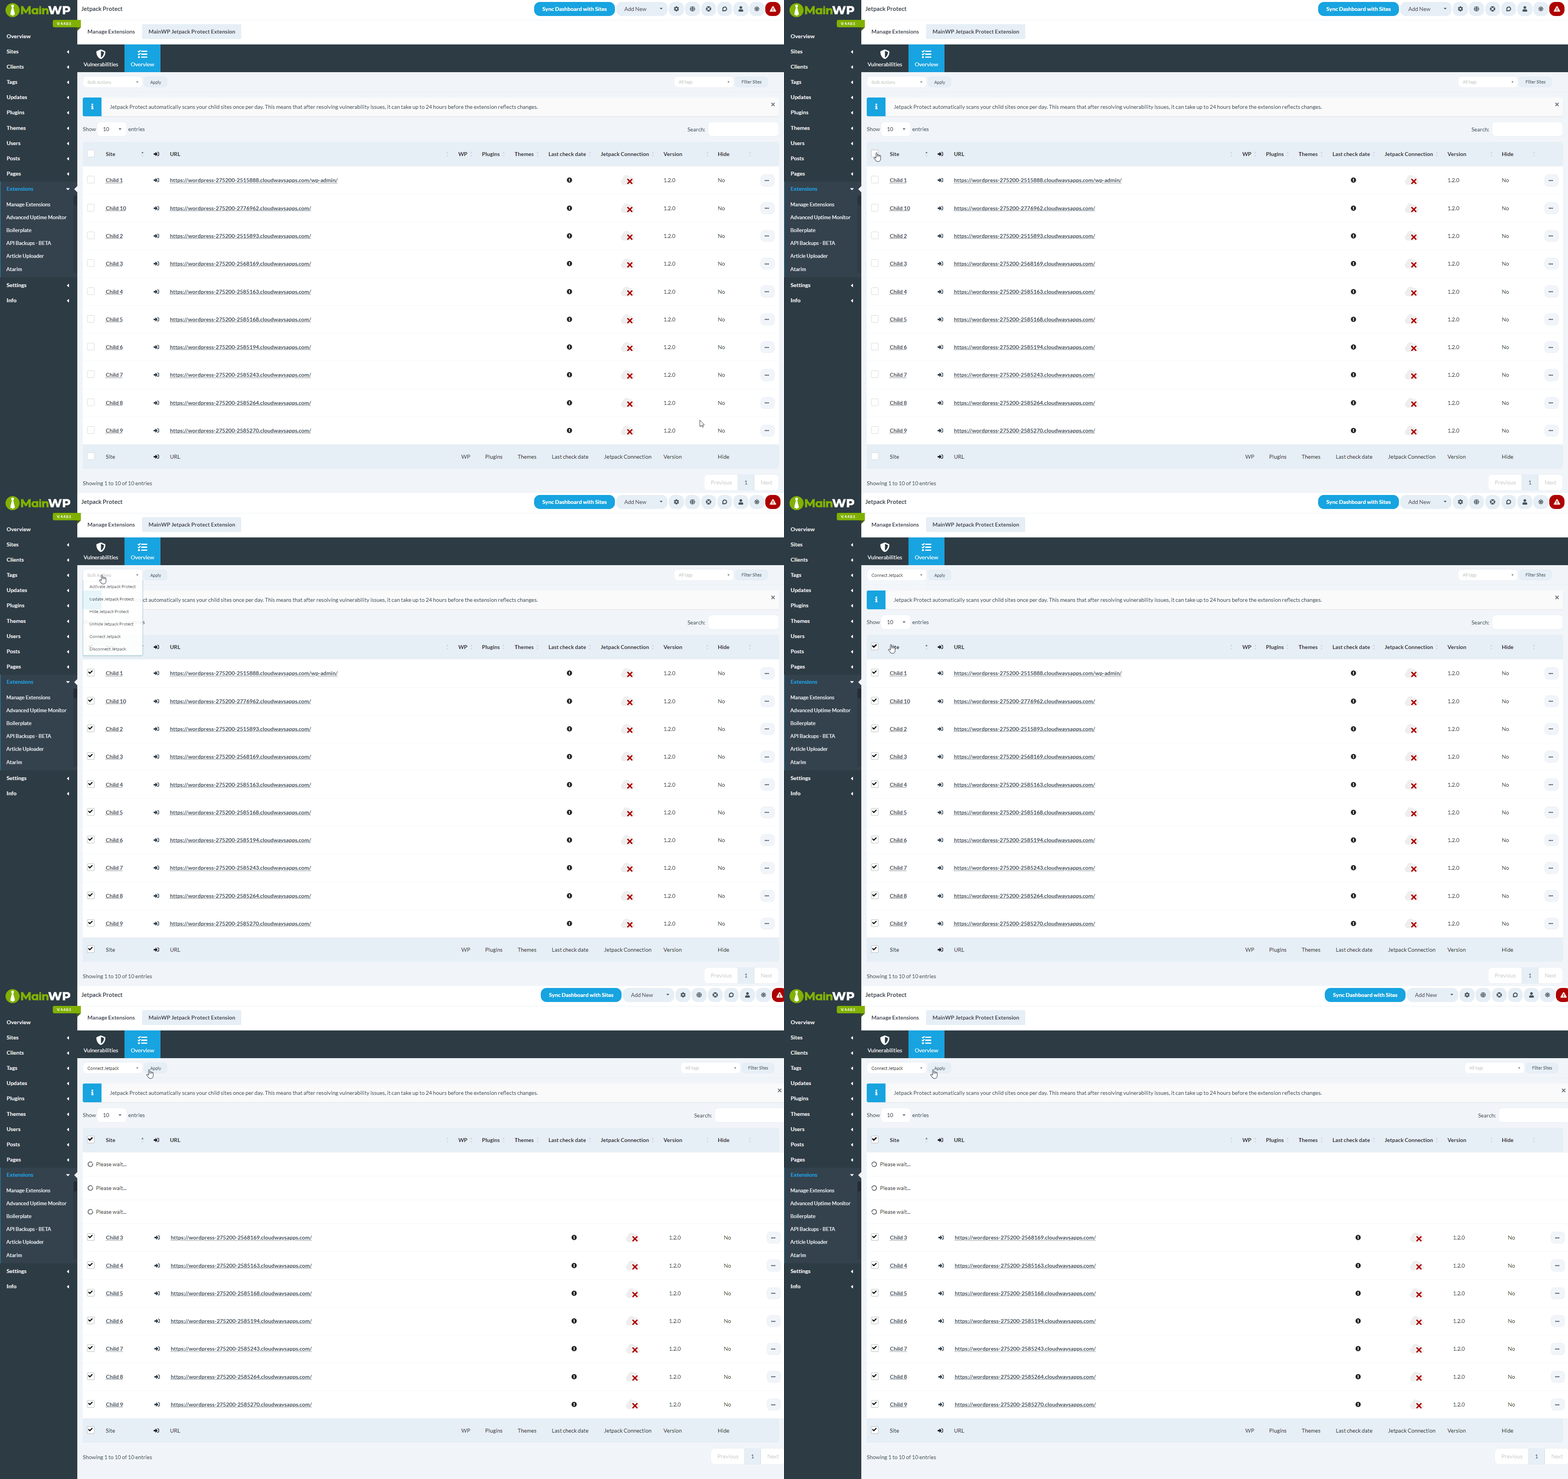
You should now see all sites in the table, with the red X icon in the Jetpack Connection column
You should now see all sites in the table, with the red X icon in the Jetpack Connection column
5
Connect the Jetpack Protect Integration to the Jetpack plugin
Connect the Jetpack Protect Integration to the Jetpack plugin
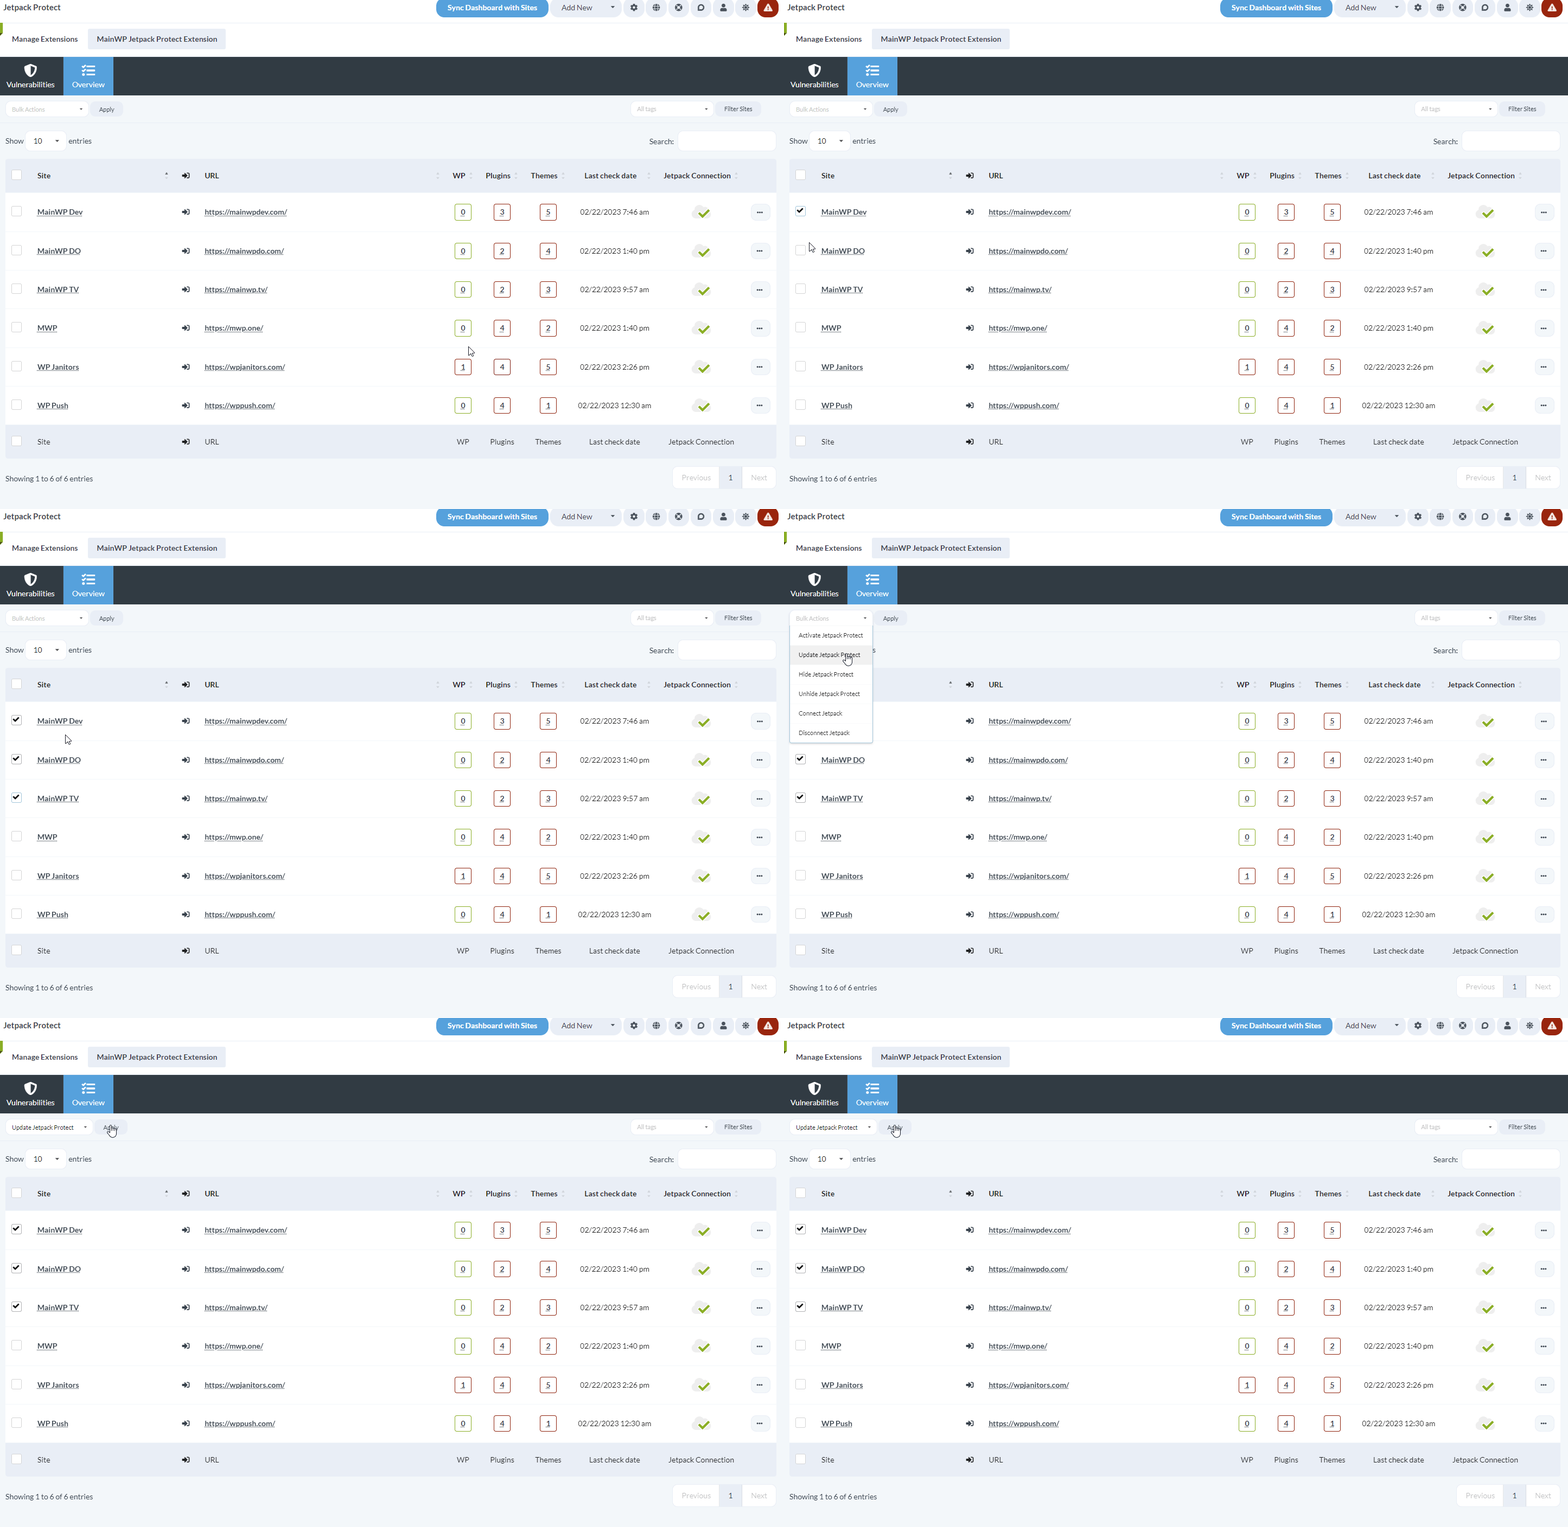
- Select all sites in the table
- From the Bulk actions menu, select Connect Jetpack
- Click Apply button
6
Perform another synchronization to get fresh data
Perform another synchronization to get fresh data.NOTE: After connecting the child sites to Jetpack Protect, it can take some time before Jetpack Protect completes the first scan.
Related Resources
- Security Add-ons - Browse all security tools
- Jetpack Scan Integration - Premium malware scanning
- Vulnerability Checker Extension - Alternative vulnerability scanning
- Jetpack Protect Abilities - Read stored Jetpack Protect data programmatically