
← Part 1: MainWP Introduction
Part 3: MainWP User Interface →
MainWP requires two components:
- MainWP Dashboard - Install on a dedicated WordPress site that controls all other sites
- MainWP Child - Install on each WordPress site you want to manage
Prerequisites
Before starting, confirm you have:- A dedicated WordPress site for the MainWP Dashboard (not an existing production site)
- PHP 8.3 or higher on the Dashboard server for MainWP Dashboard 6.4
- Administrator access to the Dashboard site
- Administrator access to each child site you want to manage
- MainWP Child plugin ready to install on child sites
Install MainWP Dashboard
1
Open the Plugins page
Go to WP Admin > Plugins on your WordPress site dedicated to hosting MainWP Dashboard.
2
Add new plugin
Click Add New.
3
Search for MainWP
Enter “MainWP” in the search field and press Enter.
4
Install the plugin
Find MainWP Dashboard in the results and click Install Now.
5
Activate
Click Activate once installation completes.
Manual Installation
1
Download
Download the MainWP Dashboard plugin.
2
Extract
If downloaded as a zip, extract the plugin folder.
3
Upload via FTP
Upload the plugin folder to
wp-content/plugins/ on your Dashboard site.4
Activate
Go to WP Admin > Plugins and activate MainWP Dashboard.
Quick Setup Wizard
The Quick Setup Wizard opens after a new MainWP Dashboard installation. In MainWP 6.4, it guides you through Welcome, Add Site, and Site Summary. You can return to it from MainWP menu (three lines, top right) > MainWP Tools (/wp-admin/admin.php?page=MainWPTools) using Start Quick Setup Wizard.
Welcome
Choose Connect my first site to connect one WordPress site, or Import a CSV to add multiple sites. Choose Skip setup, I’ll add sites later to go to the Dashboard without connecting a site.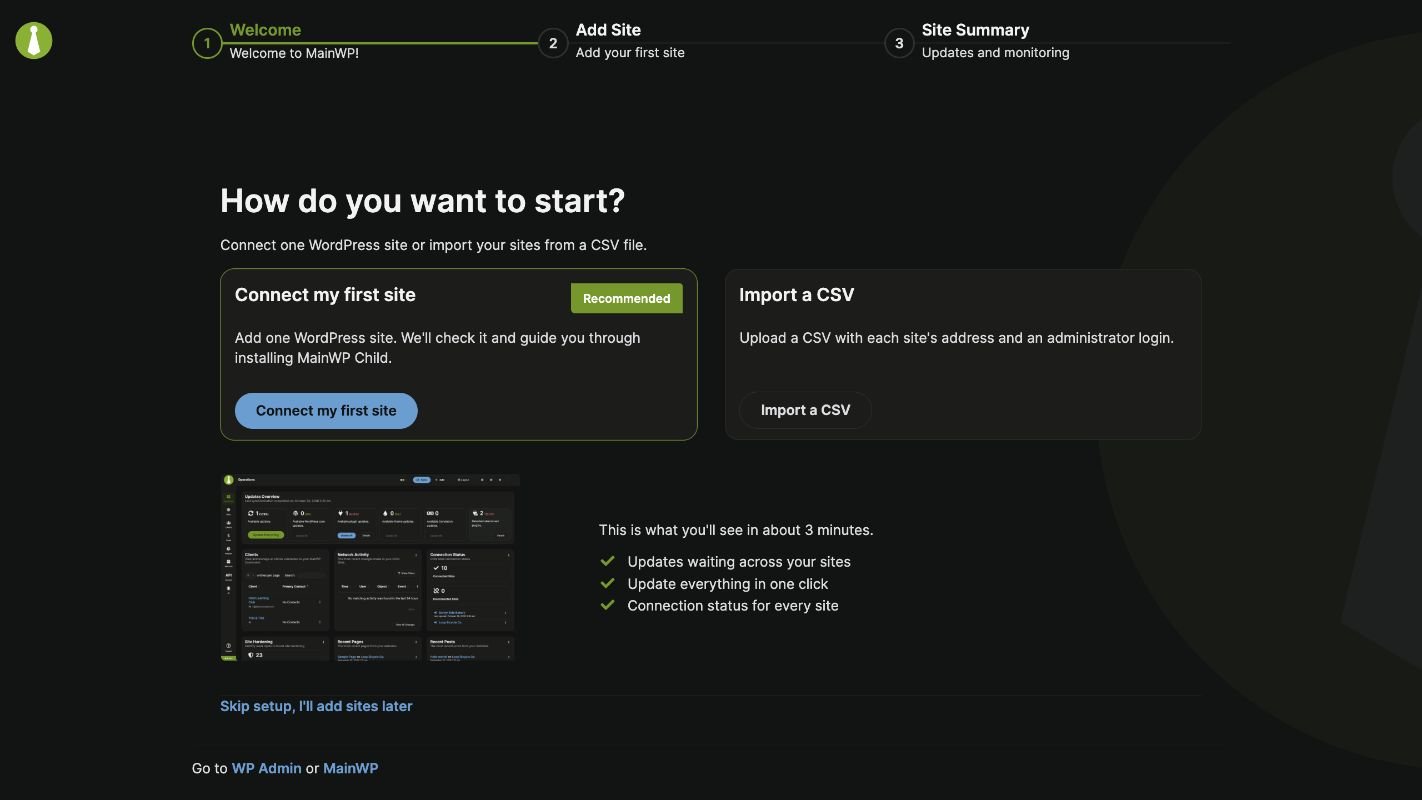
System Check
If the Dashboard does not meet the connection requirements, the wizard shows a System Check before Add Site. Resolve the reported issues before continuing. MainWP Dashboard requires PHP 8.3 or later.Add Site
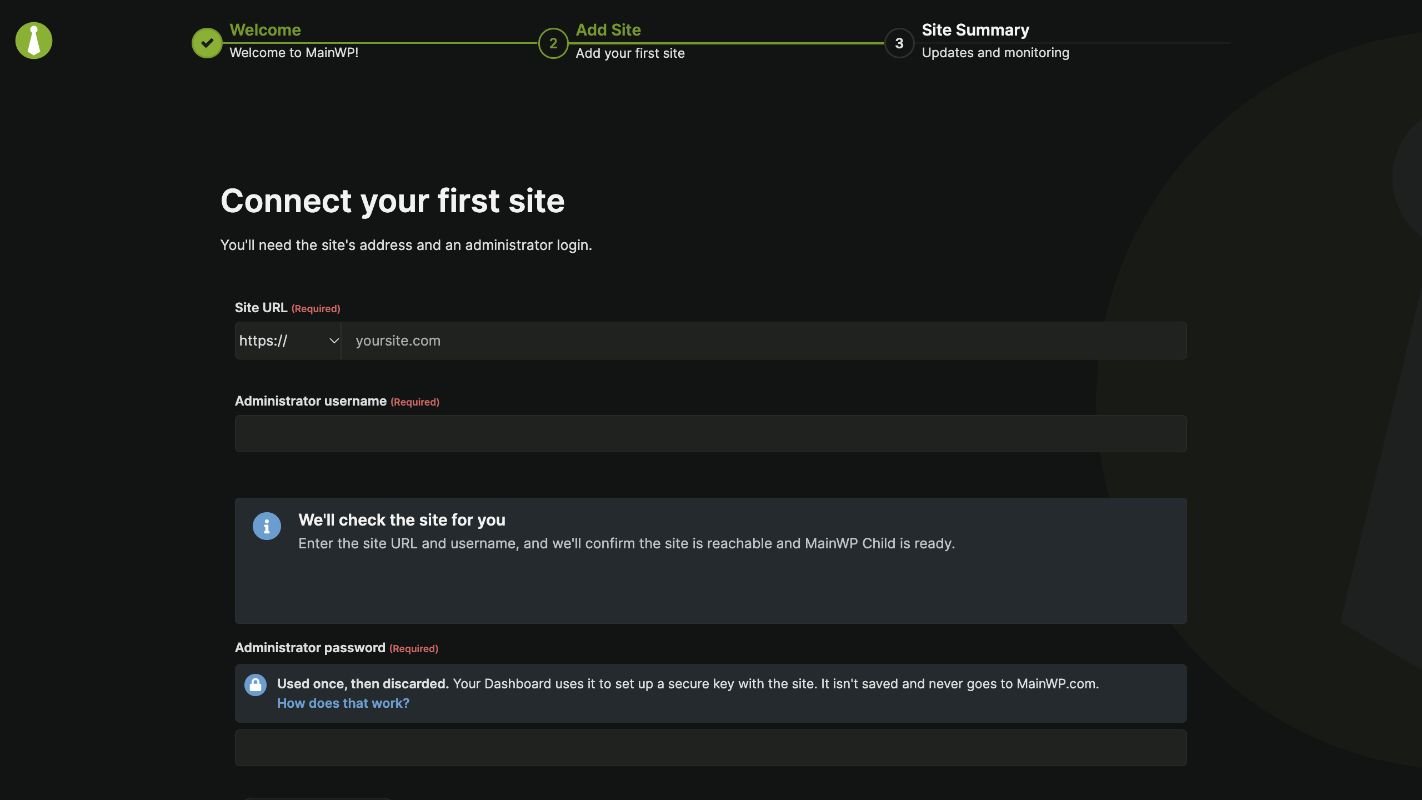
Install and activate MainWP Child on the site you want to connect, then complete the connection form.1
Enter the site details
Enter the Site URL and administrator username. Use HTTPS. MainWP checks whether the site is reachable and MainWP Child is ready to connect.
2
Authenticate the connection
Enter the Child Site’s Administrator password. MainWP uses it for this connection request and discards it; it is not saved or sent to MainWP.com.If the Child Site requires a Unique Security ID, open Advanced options and use that authentication option. Enter both credentials if MainWP Child requires both.
3
Connect the site
Click Connect site when the site is ready. If the connection window has expired, deactivate and reactivate MainWP Child on the Child Site, then try again.Use Skip for now to continue without connecting a site.
MainWP Child requires Require Password Authentication, Require Unique Security ID, or both. Check these options in the Child Site’s Settings > MainWP Child (
/wp-admin/options-general.php?page=mainwp_child_tab).Site Summary
Review the connected site’s WordPress version, available updates, uptime monitoring, and daily digest status. You can review updates before installing them, assign the site to a client, connect an AI assistant, or add another site. On a fresh installation, the wizard enables uptime checks every 60 minutes and Site Health monitoring with an 80% threshold. Restarting the wizard on an existing Dashboard preserves its monitoring settings. See Uptime Monitoring and Dashboard Settings to adjust them.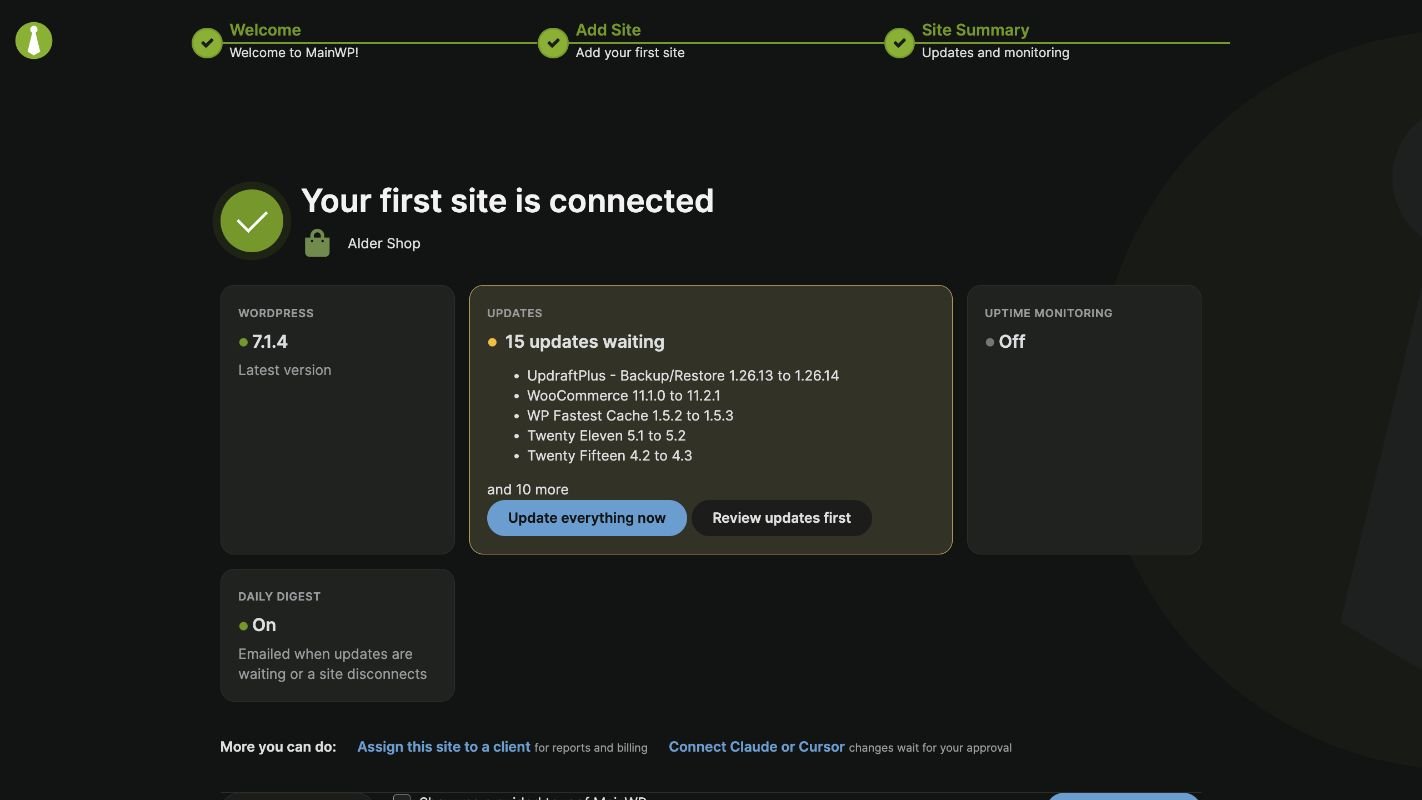
Install MainWP Child
1
Open Plugins
Go to WP Admin > Plugins on the child site you want to add.
2
Add new plugin
Click Add New.
3
Search
Enter “MainWP” and press Enter.
4
Install
Find MainWP Child and click Install Now.
5
Activate
Click Activate.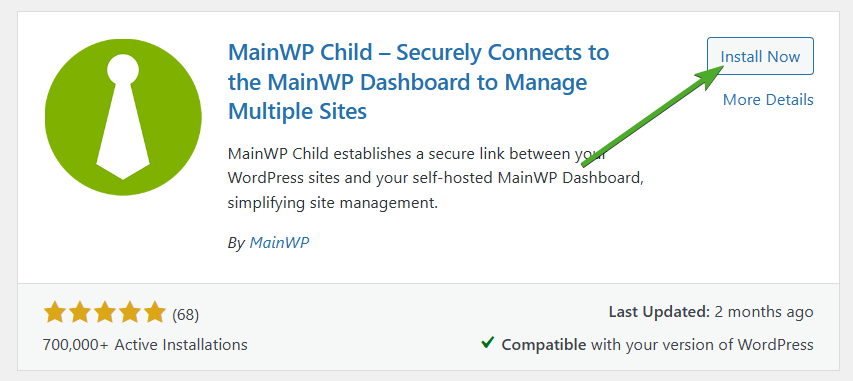
Manual Installation
1
Download
Download the MainWP Child plugin.
2
Extract
If downloaded as a zip, extract the plugin folder.
3
Upload via FTP
Upload to
wp-content/plugins/ on the child site.4
Activate
Go to WP Admin > Plugins and activate MainWP Child.
MainWP Child Plugin Settings
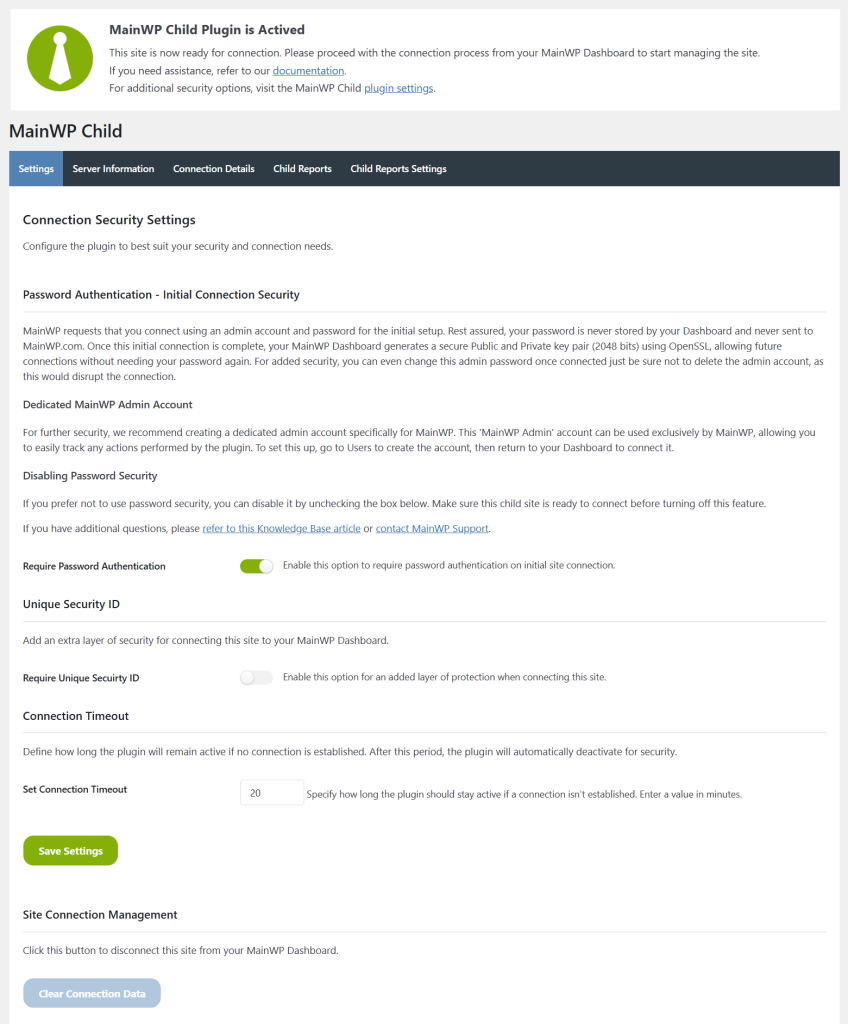
MainWP Child requires at least one of Require Password Authentication or Unique Security ID to remain enabled.
For more details, see Connection Security.
Add a Site to Your Dashboard
After installing MainWP Child, add the site to your Dashboard.1
Navigate to Add New
Log into your Dashboard and go to MainWP > Sites > Add New.
2
Enter site URL
Enter your child site URL.
3
Verify Child plugin
Toggle Confirm the MainWP Child plugin is active on this site to reveal additional fields.
4
Enter credentials
Enter the administrator username and provide the authentication method required by MainWP Child settings:
- Administrator password - Required when Require Password Authentication is enabled
- Unique Security ID - Required when Require Unique Security ID is enabled
5
Add optional settings
6
Connect
Click Add Site.
Add-ons Settings Synchronization
When supported MainWP Add-ons are installed, the Add New Site form can show synchronization options:- Install a required third-party plugin on the child site
- Apply the add-on plugin settings (or global add-on options) during site connection
If you experience connection issues:
- Use Test Connection to verify Dashboard can communicate with the site
- Check Potential Issues for solutions
- Submit a support ticket if needed
Test Connection
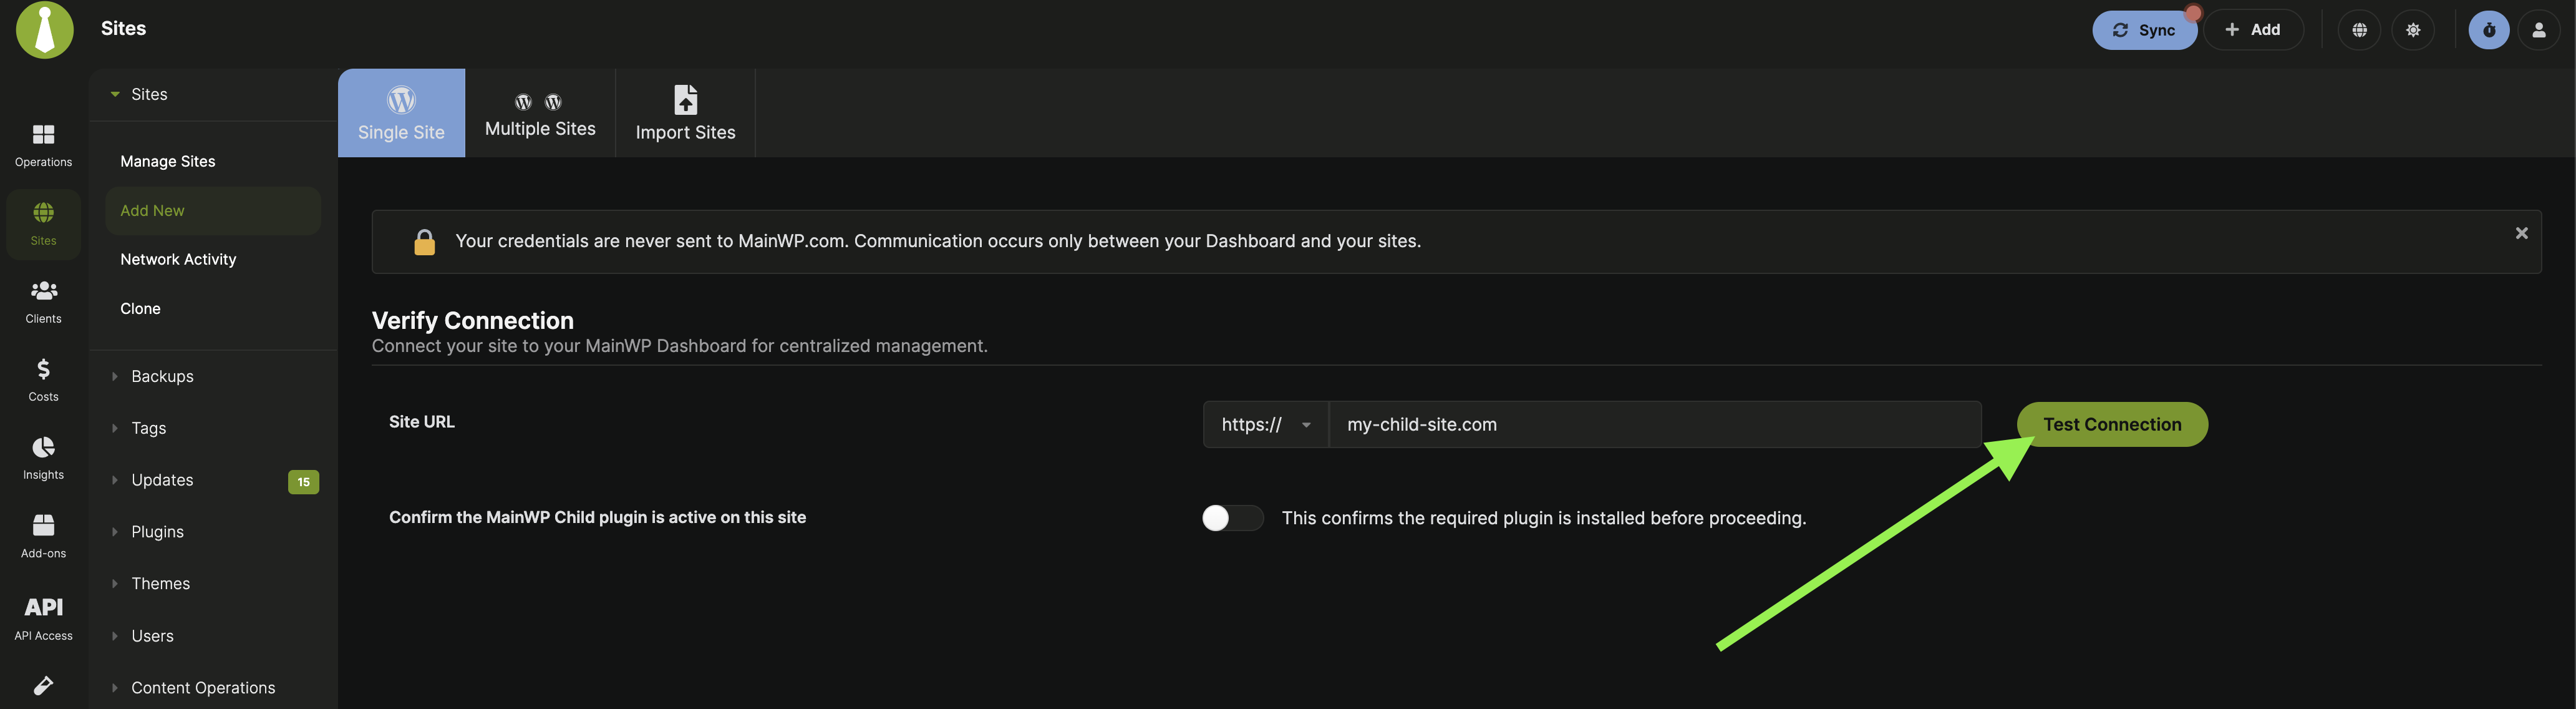
Test Connection verifies what your MainWP Dashboard can reach, which may differ from what your browser sees.1
Open Add New
Go to MainWP > Sites > Add New.
2
Enter URL
Enter your child site URL.
3
Test
Click Test Connection.
Protect Your Connected Sites
After connecting your first Child Site, set up its backups. MainWP Dashboard 6.4 includes MainWP Built-In Backups for creating, scheduling, and restoring backups directly through MainWP Dashboard and MainWP Child. Start with a backup and restore test on a staging site. You can also use API Backups with a supported hosting provider or an existing backup add-on.Completion Checklist
Verify your setup is complete:- MainWP Dashboard installed and activated on dedicated site
- Quick Setup Wizard completed (or skipped intentionally)
- MainWP Child installed on at least one child site
- Child site connected successfully (shows in MainWP > Sites > Manage Sites)
- Test Connection returns HTTP 200 status